It all started with a comment from my doctor. He told me that, ideally, I should wake up like Mickey Mouse: bright, energetic, and ready to leap out of bed.

I thought about my own mornings. The reality was a slow, groggy 30-minute crawl out of sleep. Mickey Mouse? I was more like a grumpy bear waking up from a long hibernation1.
Then one day, the ventilation failed in my office. After a few hours in the stuffy air, I had the exact same groggy feeling and a splitting headache. The pieces clicked into place. My office felt just like my bedroom in the morning. The enemy was CO2.
My bedroom was the perfect trap. As a light sleeper in the city, I seal it for silence. The window is closed to block out seagulls, and the door is shut to mute the rest of the apartment. Ventilation-wise my room has only a “trickle vent” – a small slit above the window to suck in fresh air based on pressure difference. But it didn’t feel like it was enough.
And so, a new obsession was born. I have a habit of looking for a “silver bullet”, a single fix that I believe will solve everything. If I could just lower the CO2 in my bedroom, I’d be more productive, make better decisions, and be happier. These waves of inspiration are my favorite part of any project. The bullet never solves all the problems, but the process is usually worth it.
It was time to build a solution.
Measuring the Problem
Before I could solve the problem, I had to measure it. I remembered a Hacker News post about a DIY CO2 monitor and ordered the parts.
My soldering skills were rusty, so a helpful stranger at the local maker space coached me through pin soldering without frying the sensors.
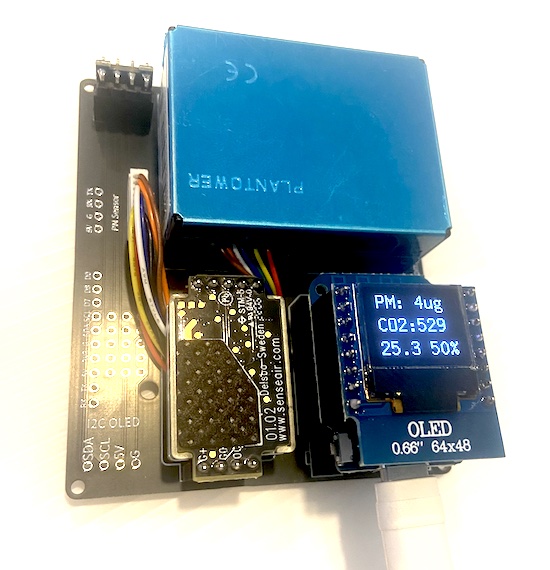
I put the new sensor on my nightstand. The next morning, the results were bad. While fresh air sits at 400 ppm and stuffiness symptoms begin around 1,000 ppm, my room was peaking at 1,700 ppm.
While it isn’t dangerous, it still might’ve been the reason for my morning grogginess.
The Main Idea
My rental agreement meant I couldn’t drill holes in walls. The only way for air to get in or out was the 18mm gap under my door. This led to my main idea: if I could actively push stale air out from under the door, the negative pressure in the room would pull fresh air in through the trickle vent.
The heart of this system would be a fan. It needed to be powerful enough but also quiet. My mind went straight to Noctua, a brand PC builders use for silent fans. I chose the NF-F12 PWM model, which has high static pressure (good for pushing air through tight spaces) and low noise.
Now for the main design challenge: how to funnel the air from a round 120mm fan into a long, thin gap.
The Pizza Box Prototype
I started designing a duct in CadQuery, a Python library for making 3D models. I hoped current LLMs could create the 3D model from my description alone, but I was quickly proven wrong. So I did it the old-fashioned way, defining it myself part by part.
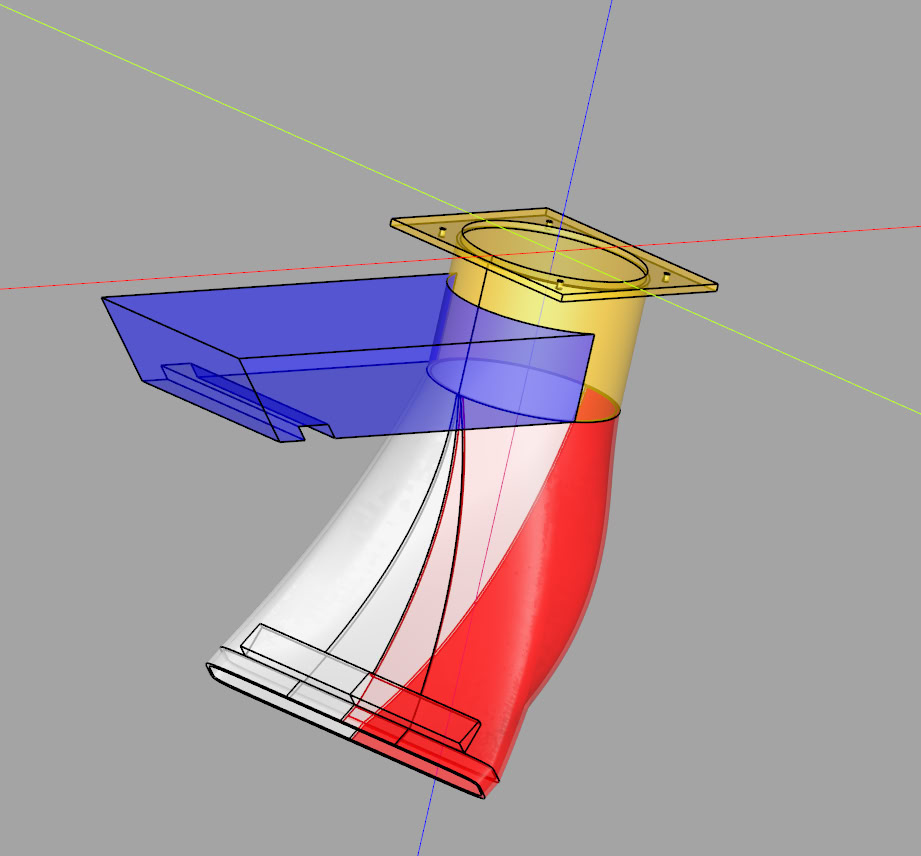
In my first design, I planned to mount the fan and duct directly onto the door with ropes so it would move with it (blue part would push against the door and the notch at the end is for rope). Before starting a long 3D print, I decided to build a quick and dirty prototype.
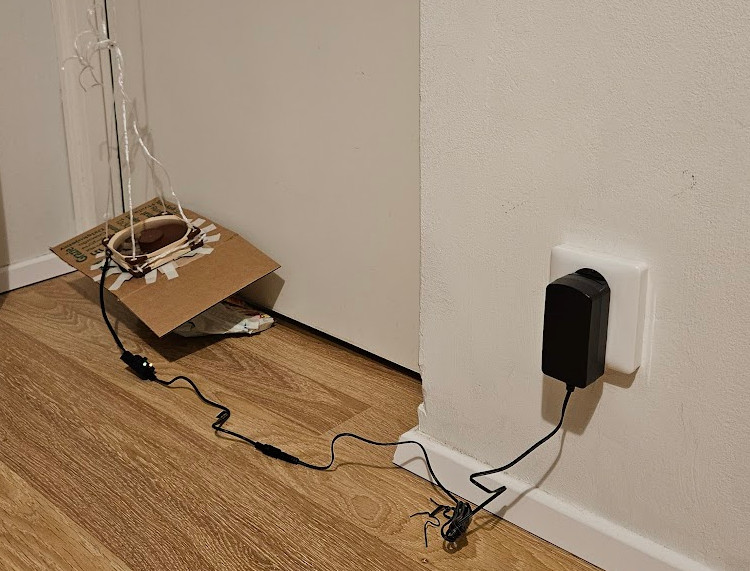
Using two pizza boxes and some tape, I mocked up the shape. I held my cardboard contraption against the door with the rope, just as I’d planned. Then, I let the rope go slack.
It just sat there. On the floor. Perfectly stable.
It was a facepalm moment. I had to laugh at myself for over-engineering it. Why did I think it needed a complex mounting system? It could just be a simple, floor-standing unit.
The prototype also worked, lowering the CO2 by about 150 ppm with the fan at 40% speed (for lower noise). Now it was time to improve on the design.
First 3D Print
My first 3D-printed version came from a research rabbit hole. I’d read that industrial ventilation needs huge, smooth turns to prevent turbulence. The result was a beast—a three-part device with 4mm thick walls that looked like a defensive tower from a strategy game.
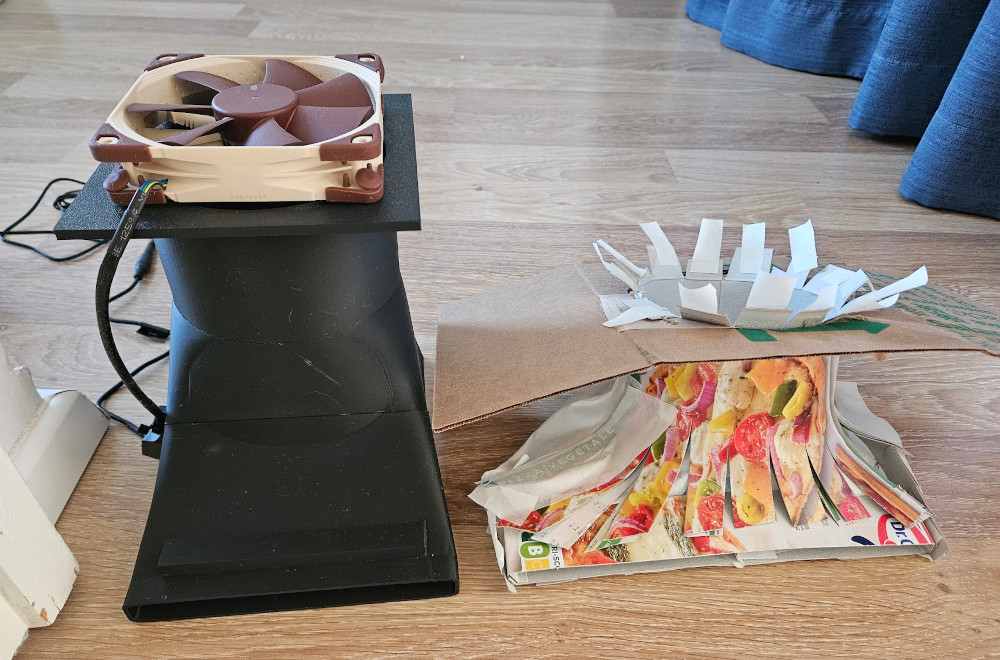
It worked a little better than the prototype, lowering CO2 by about 200 ppm by itself. But looking at it I realized it was overkill. For my setup, I didn’t need industrial-grade design, the air speed was almost imperceptibly low. I could make the duct much simpler and smaller.
Further Improvements
My first thought was to just add more fans side-by-side, but that would get expensive and might be premature. I decided to improve the design first.
The first breakthrough came one morning, as I was lying in bed; my brain must have been working on the problem in the background. Why the 90-degree turn? The fan could work in any orientation. By placing the fan on its side, I could get rid of the turn completely. This would save a massive amount of plastic and print time, and also reduce air friction losses from the bend.
I went back to CadQuery and designed a much sleeker version. The defensive tower had evolved into a… simple funnel.

After printing two new funnels, experimentation led to two more improvements:
- Instead of just pushing stale air out, using one fan to actively pull fresh air in from the hallway dropped the CO2 by another 100 ppm.
- There was no draft in the room. Air exchange away from the door was slow, likely relying on simple diffusion. I realized I could accelerate this. I already had quiet standing fan so I placed it near the door, aimed inwards. That, surprisingly, cut another 200 ppm without adding more fans.
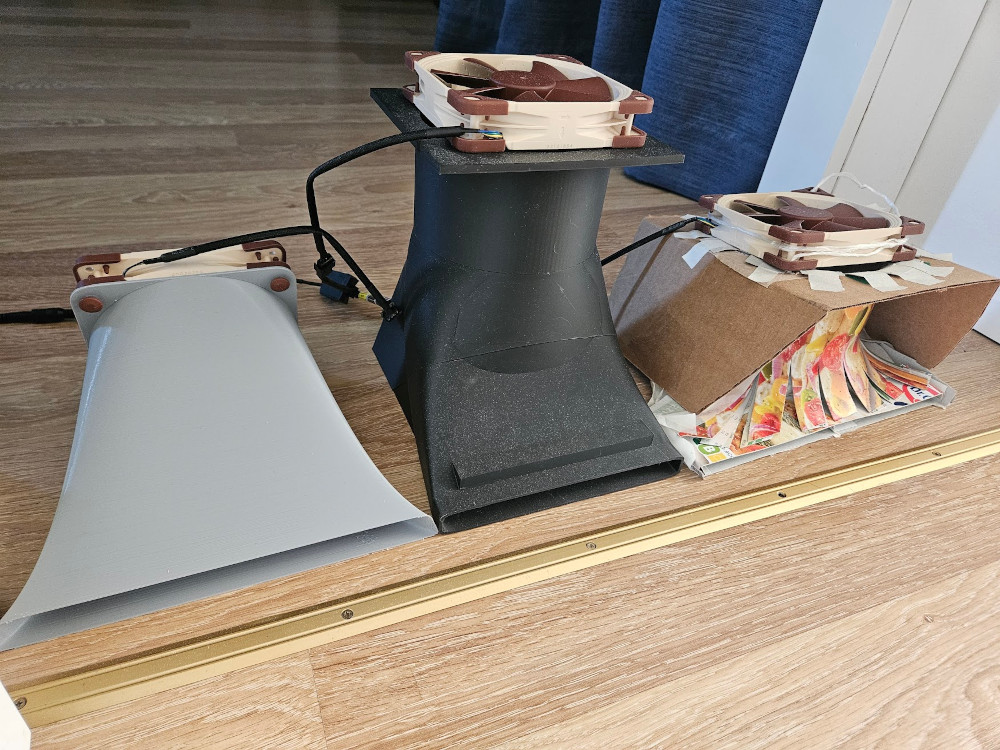
The Final Current System
Today, the area by my door is a mess of wires and fans, but it works. A single power adapter feeds a PWM controller, which then splits the signal to my three fans.
What’s Next?
-
UPD The Hacker News discussion gave me a great new idea: flip the entire system on its head. Instead of creating negative pressure at the door, I could create positive pressure from the source of fresh air. This means installing a fan directly in the trickle vent to actively pump fresh air in. I’ll need to design a new duct to adapt the fan to the vent’s shape and add a coarse filter.
-
I still don’t fully understand why the system works as it does. Is it really creating negative pressure and pulling fresh air through the trickle vent, like I first thought? Or is it just mixing the air near the door and propagating it? The next step is to find a way to measure the actual airflow.
-
The other improvement is more practical. Right now, my setup is a functional but messy collection of parts. I’d like to design and print a single, clean enclosure to hold all the fans. It would look better and be much easier to move out of the way when I need to.
Build Your Own
- 3D Models & Code: on GitHub
- Primary Fan: Noctua NF-F12 PWM — for its high static pressure
- Fan Controller: Noctua NA-FC1 — for easy manual fan speed control
- Power supply: Noctua NV-PS1 — also packs 1-to-3 splitter cable
- CO2 Monitor: AirGradient DIY v4
- Standing fan: Xiaomi Mi Smart Standing Fan 2 — at 1% speed it’s almost as quiet as the smaller fans
So, Am I Mickey Mouse Now?
I don’t wake up with a cartoonish smile every day. But my mornings are better. The grogginess is mostly gone, and I feel more rested. Of course, it could be the summer starting (circadian rhythm/melatonin change, etc), placebo or some combinations of factors.
Most importantly, I loved the process. I learned about ventilation, got better at 3D modeling for 3D printing, and felt the satisfaction of building something real that solved my own problem. That journey, with all its mistakes and small victories, was the real reward.
-
Since my biohacking days, I’ve been pretty strict about sleep hygiene. I consistently get my 8 hours, go to bed at the same time, and avoid things like late-night meals or alcohol. I was confident the issue wasn’t just poor sleep habits. ↩